
This week we are exploring how to make your own products. Who does not want to save money? Today's DIY is glimmer/ glitter paste.
What Is Glimmer Paste
Glimmer paste is a high-quality paste that allows to add gloss and shine to all of your paper crafts. It has a smooth, creamy texture that can be used on a variety of surfaces, including paper, wood, fabric and more.
There are currently 12 colors available. You can use a single color or mix two colors together. It is up to you.
It dries quickly and is considered durable.
You can mix it with other media to create custom colors and designs. It adds texture to all of your designs.
It can be applied to stencils and other texture tools with a sponge, palette knife or brush.
Glimmer paste is similar to embossing paste. The only difference is that is has a brighter sheen and some glitter effect to it. It is used with stencils to create textured effects on cards, scrapbook pages and journals.
Make sure when you are mixing these, that you mix on a surface like a glass mat, a craft mat or a parchment paper.
Ways To Use Glimmer Paste
Directly On Paper
You can use a palette knife, fingers, or any other tool that you would like to add some glimmer paste directly onto cardstock.- Use some bubble wrap pressed directly into the cardstock to create a bubble-like effect.
Apply Through A Stencil
This is the most popular way to use Glimmer Paste. Make sure as soon as you use the stencil, wash it right away in warm water and some mild dish soap.
- Use a craft mat or a piece of parchment paper to cover your workspace,
- Place a piece of cardstock on your workspace.
- Place a stencil over the cardstock and tape down with low tack tape,
- Spread the Glimmer Paste evenly over the stencil with a palette knife.
- Remove any excess product from the stencil and place it back into the jar.
- Carefully remove the stencil from the cardstock
- Let the project air dry.
Apply It Through A DIY Mask
You can easily cut a mask from some masking paper to create a custom mask that will add lots of dimension to any project. All you need is some masking paper and a die cut. This technique creates a glitter paper like appearance.
- Die cut any shape or design on your masking paper following the recommendations of the manufacturer to create a die cut sandwich (the order of the plates and materials to go through your machine
- Place a craft mat, silicone mat, or parchment paper.
- Remove the backing piece from the masking paper and apply to a piece of cardstock.
- Apply some distress ink color that is close to the Glimmer Paste that you are using.
- Then spread the Glimmer Paste over the distress ink,
- Remove the masking paper.
- Let the project air dry.
Use Glimmer Paste Like Glue
You can use Glimmer Paste to secure sequins and other small embellishments to add extra dimnension, color and interest.
DIY Glimmer Paste
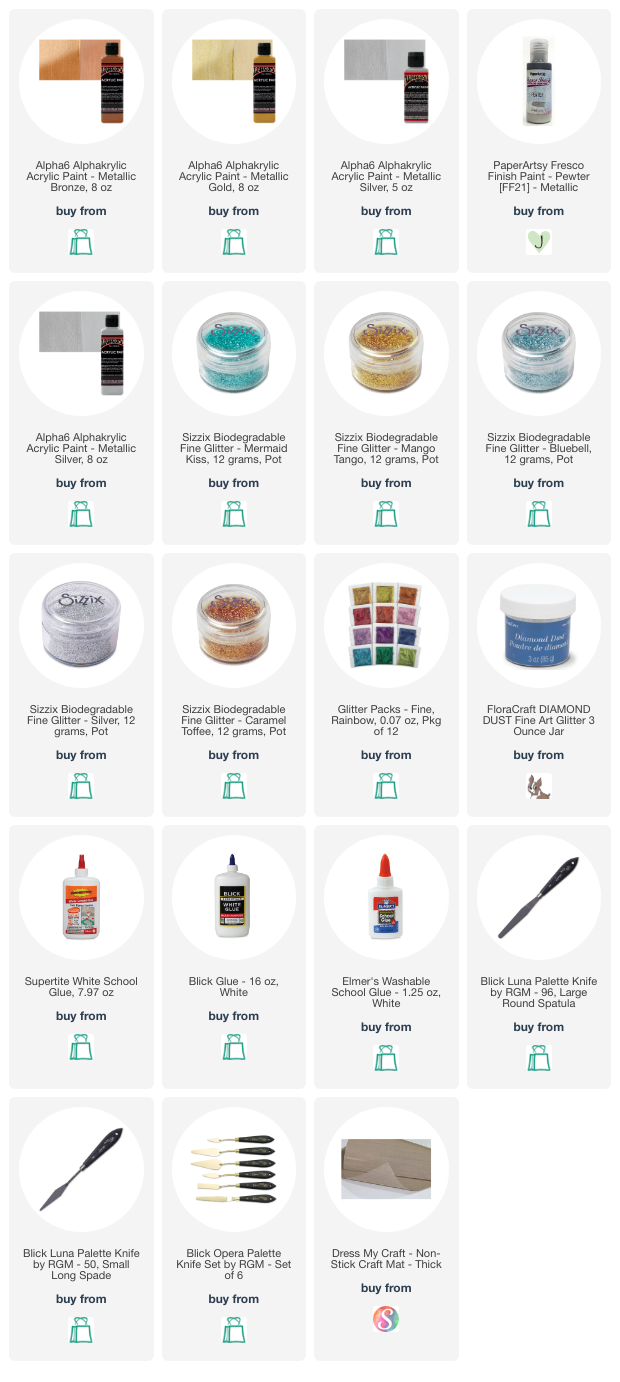
Supplies
- Elmers or any clear white glue 1 1/2 TBSP
- Metallic paints-1tsp
- Coarse Glitter -1/2 TBSP
- Fine Glitter- 1 TBSP
- Small amount of baby powder- just a pinch
- Palette knives- to apply the paste and to mix it
- Containers to store the paste.
- Place your glitter into the container.
- Add the white glue. Mix together.
- Add the metallic paint and mix together.
- Mix till all the glitter is throughout the glue and the paint.
- Cover the container when not in use.
Recipe Two
- Liquitex heavy gloss gel
- Fine glitter
- Perfect pearls or pearlex
- Palette knives
- Containers for mixing and storage.
- Place some of the gel into the container-about 1/2 full!
- Add the glitter and mix well till the glitter is throughout the gel.
- Add the pearlex and again mix till the color is mixed throughout the gel.
- Cover and store.
Recipe Three
- Baby or talcum powder-2 portions
- White PVC glue- 1/2 portion.
- Metallic or pearl paint-1 portion.
- Fine glitter 1/2 portion
- Coarse glitter 1/2 portion
- Container with lid to store paste.
- Mix the glitters together.
- Add the glue and mix.
- Add the paint and mix.
- Add the talcum powder and mix.
.png)
Once you have created your glimmer paste, here are some resources to help you use it.

Till Next time, Happy Crafting!
Linda

Comments
Post a Comment
We would love to hear your thoughts, ideas, or just say hello. We appreciate your time here today. Thank you for stopping by!