
Sometimes, you would like to heat emboss in a color that you may not have the embossing powder for. There is an easy and quick remedy for that situation. I keep lots of clear embossing powder on hand just in case I am stuck without the right color embossing powder. This technique gives you a lot more options when your collection of embossing powders may be limited.
Let's Start With Some Heat Embossing Basics
If you have never heat embossed or found the process less than satisfactory, we are going to break down the basics for you today and then move into one of my favorite techniques-heat embossing in colors. There are only a few things that you need to do heat embossing.
- Embossing Powder-The embossing powder is medium that is melted over a stamped image to create a two-dimensional effect of your projects. It comes in clear, white, colors and metallics. They are sold as single jars or in packages of three.
- Heat tool (heat gun)-A heat gun is used to melt the powder that is used in the process. I have seen people use hairdryers, but honestly, they do not get hot enough. You want a heat gun that has directed heat to the paper where you have applied the embossing powder.
- Versamark Ink- This is a special ink that is used for embossing. It is a sticky slow drying ink. When stamped, the embossing powder stick to any place where you have applied the ink. Youwill also want to have the Versamark refill so that your ink pad always has the right amount of ink to get the job done.
- Stamps-You can use any stamp that you have to create your embossed image.
- Cardstock- Of course you need some cardstock to emboss on.
- Embossing Bag- this is a powder in a fabric bag that removes the static and any oils from your fingers. This helps so that any stray pieces of embossing powder does not stick anywhere where you do not want it. It helps give you a cleaner image every time. It is rubbed over the cardstock before you apply any embossing powder.
- Soft Bristle Brush-used to remove any stray bits of embossing powder from your project before you heat it.
- Tweezers-used to hold the cardstock when you apply the heat to it.
- Embossing Tray With A Funnel- This collects the embossing powder when you apply it to the paper. The end of the tray has a funnel so that you can all the left-over powder back into the jar with no waste.
Basic Embossing Steps
- The first thing to do is to cut a piece of cardstock in the size that you need it.
- Place a craft mat or a piece of parchment paper on your work area. You will want to have the paper taped down with some low tack tape.
- Go over the entire piece of paper with the embossing bag at least twice.
- Place a large (12" by 12" paper under the cardstock you are embossing.
- Stamp the stamp with the Versamark ink.
- Pour the embossing powder over the cardstock.
- Pour the remaining powder back into the jar.
- Use the soft bristle brush to remove any stray pieces of embossing powder.
- Warm the heat tool as the manufacturer recommends.
- Hold the paper with the tweezers in one hand and the heat gun in the other.
- Heat the paper with the embossing powder moving the gun on top and below the paper until the embossing powder melts.
- Allow the cardstock to cool.
.png)
- You can actually emboss a whole piece of cardstock to create a shiny or metallic paper. Once you have done that, you could then place the paper into an embossing folder and run that through your embossing machine to create a custom paper.
- Always use the higher setting on your heat gun for embossing powders.
- Make sure that your heat gun is completely cooled before you put it away.
Embossing In Any Color- The Simple Way
If you are able to work fast enough, you can emboss any color ink that you may have. All you have to do is stamp the image. Cover with clear embossing powder and heat with a heating tool.
Embossing Any Color With Versamark Ink
Versamark ink makes the embossing powder stick to the image. Having a Versamark ink pad gives you the ability to emboss without having a lot of embossing powder in your stash. It is a good investment to help you create a wide variety of embossed images.
Supplies
Versamark Ink
Ink Pad in the color of your choice
Card stock
Versamark Ink
Ink Pad in the color of your choice
Card stock
Embossing magic
Clear Embossing Powder
Heating Tool
Stamp of your choice
.png)


Clear Embossing Powder
Heating Tool
Stamp of your choice
- Ink your stamp in the Versamark Ink
- Without stamping, ink your stamp with any other color of your choice (you are inking on top of the Versamark ink
- Stamp the image.
- Quickly sprinkle the clear embossing powder on top of the inked image before the ink dries
- Heat set with the heating tool.
The second part of this video shows you how to emboss with extra dimension and shading so watch it through !
If you do not have a coordinating die cut for your stamp, just fussy cut them!
.png)

I hope that you will give this technique a try. Once you get the process, you will find yourself doing a lot of embossing on all of your paper crafts.
Until next time, Happy Crafting!
Linda

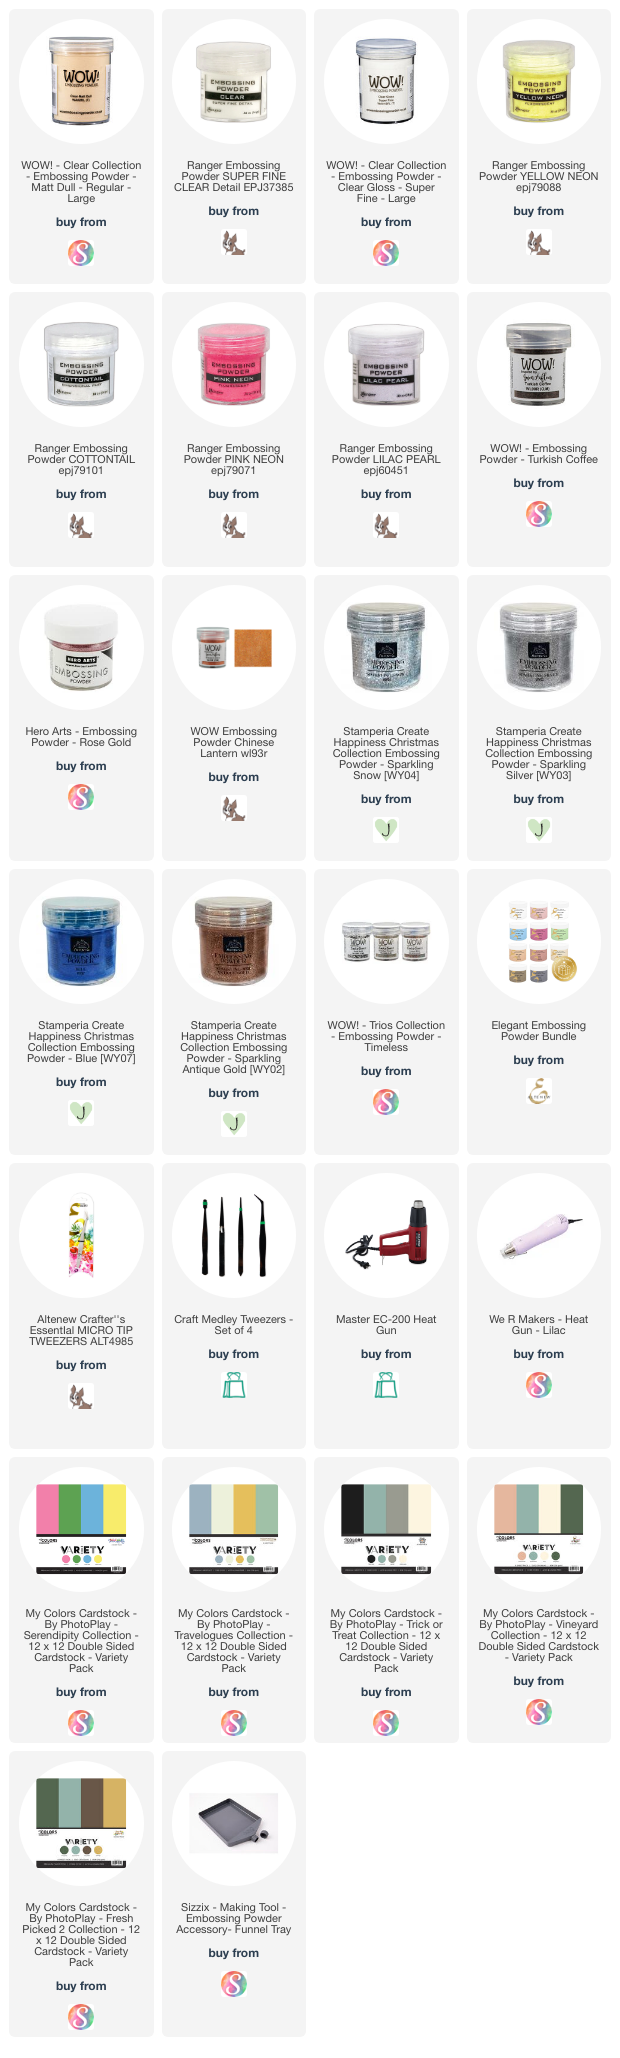
Here are all the supplies that you need to create the heat embossing techniques
Comments
Post a Comment
We would love to hear your thoughts, ideas, or just say hello. We appreciate your time here today. Thank you for stopping by!